Essential Things to Know Before Changing Your WordPress Theme
Do you know what to do before changing your WordPress theme?
When changing your WordPress theme, there are a few very important steps you need to take. These will ensure that the process is done correctly and that you don’t lose any important data.
This WordPress checklist will discuss the essential things you need to do before changing your WordPress theme.
Changing your theme is an important decision every website owner faces at least once every few years.
Of course, you should know the reason for the change and choose a theme that suits all your needs.
After choosing a new theme, follow the checklist below to ensure you don’t lose any content or data during this process.
1. Make a note of any WordPress theme customizations
Some WordPress website owners customize their WordPress themes by adding code snippets directly to their theme files. These code snippets are a great way to add new features to your website that aren’t part of the theme.
However, if you add those snippets directly to your theme files, it’s easy to lose track of them.
If you’re making the changes as a web developer, review your current theme files and note down all the code you’ve added.
To add code snippets in the future, we recommend using a site-specific or code snippets plugin. That way, you can keep those snippets even if you switch themes later.
2. Determine the performance metrics of your current WordPress theme
Before switching your WordPress theme, you should check your current website’s loading speed and performance. This will help you compare any differences in page load times after changing themes.
Since WordPress speed and performance play a major role in user experience and SEO, you should ensure that your new theme is faster than your current theme.
You can easily check your current website speed metrics using WordPress speed testing tools, such as the free IsItWP website speed test tool.

3. Take notes on your current theme’s sidebars and widget positions
Sidebars add widgets to your website, such as email newsletter subscription forms, social media buttons, popular posts, and more.
Since each theme has different widget sections, your widgets may also move or disappear unexpectedly on your site if you switch.
That’s why it’s essential to note the widgets in your WordPress sidebars and other widget areas of your website before switching your WordPress theme. You can easily replicate them after changing your WordPress theme.
If you’ve added any custom code or shortcodes, copy this code and save it somewhere safe so you can use it in your new theme.
4. Copy your existing WordPress tracking codes
Many users add the Analytics tracking code directly to their theme files. Some WordPress themes or templates allow you to add tracking codes directly to your theme options panel.
Ignoring these critical tracking codes is a common mistake.
You should copy and add all the existing tracking codes used for analytics, advertising, and other purposes to your new website.
If you want to make this process easy for yourself, we recommend installing Google Analytics in WordPress using a plugin like MonsterInsights.
With MonsterInsights, you can ensure that your analytics will not be interrupted or that data will not be missing. You can also track links and button clicks, WordPress category and tag analysis, author tracking, and more.

You can use the Insert Headers and Footers plugin for other tracking codes.
5. Back up your existing WordPress website
It’s always a good idea to back up your website. Before changing your theme, you should back up your posts, pages, plugins, networks, and databases.
The easiest way to do this is to use a WordPress backup plugin to create a backup of your entire site. One such plugin is UpdraftPlus.
This will help you easily restore your website if you encounter problems while changing your WordPress theme.
6. Put Your WordPress Site in Maintenance Mode
When making changes to your site, it’s always a good idea to put your website in “Maintenance” mode. This will give your visitors a user-friendly warning.
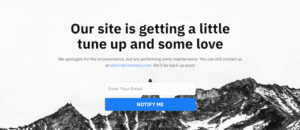
This way, other visitors won’t see your website until it’s half-finished or under construction.
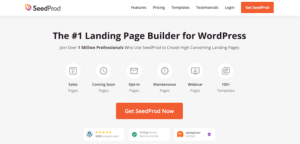
We recommend using the SeedProd plugin for this. It’s the best WordPress page builder on over 1 million websites.
You can easily create custom maintenance pages, landing pages, coming soon pages, 404 pages, and more.
7. Test all the functionality and plugins installed on WordPress
When you activate a new WordPress theme, you must ensure that it functions like the previous one and that all your old plugins work in the new theme.
You can start by adding code snippets that you copied from your old WordPress website template files.
Then, spend some time working on the features of your site that are supported by WordPress plugins.
8. Test your new WordPress theme across browsers and devices
Testing your new website across different browsers ensures it will be suitable for screen sizes on various operating systems and mobile devices.
Most visitors will likely visit your WordPress blog using Google Chrome. However, hundreds of millions of users worldwide still use other web browsers, such as Firefox, Microsoft Edge, Opera, Safari, and others.
You lose visitors and traffic if your new website doesn’t work correctly on one of those browsers.
Fortunately, you can use various cross-browser testing tools to see how your website looks on different browsers and devices.
9. Remove WordPress plugins that you no longer need
Some WordPress themes include pre-installed plugins or extensions. Some may be useful, but others are unnecessary.
Go to Plugins > Installed Plugins to see if your theme has added a new plugin.
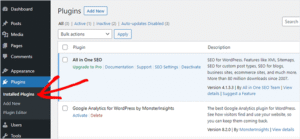
Now is a good time to review your entire list of plugins to see if any are worth deleting.
10. Let your users know that your new website is live
When you’re ready to launch your new WordPress theme, you can turn off Maintenance Mode.
You should also contact your readers to inform them about your new website. This will prepare them so they don’t get overwhelmed by the big design changes, and it will also keep your subscribers coming back to your site to see the new design.
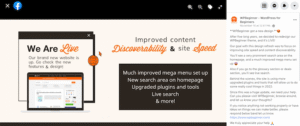
Below is an example of a post shared on Facebook about a new website redesign.
We recommend that you inform your audience via email newsletter, social media, and push notifications or Notifications.
11. Test the loading speed of your new WordPress theme
Once your new theme is activated and you’ve completed the steps above, it’s time to run another speed test. Ideally, your new website will be faster and score better on the speed test.
To do this, use the same speed tool you used before and compare the results.
If your new theme is slower than your old one, test it several times from different locations and check for any caching or firewall settings that could be causing the speed drop.
12. Monitor your WordPress website’s bounce rate
The bounce rate is the percentage of visitors who land on your website and leave without going to the next page. A high bounce rate means you haven’t convinced your visitor to stay on your site long enough to take action.
Monitoring your bounce rate after switching to a new WordPress theme is essential. Some themes are better at helping visitors navigate your site.
If your bounce rate has increased since you switched, then you should work on reducing it. You can do this by improving your navigation menus, adding more internal links, adding a widget to popular posts, and more.
13. Listen to Reader Feedback to Improve Your WordPress Website
Finally, it is essential to listen to your audience’s feedback after you switch to a new theme. Some readers may love or hate certain parts of your design.
You don’t have to listen to every reader and make their suggested changes. However, it’s worth investigating if a group of readers have the same problem.
You can collect visitor feedback by adding a contact form to your website or by surveying readers for feedback on the new design.
The easiest way to do this is to use WPForms. This tool is the best WordPress survey plugin on the market, used by over 5 million websites.
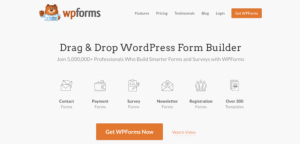
This plugin allows you to create attractive survey forms with drag and drop functionality easily.
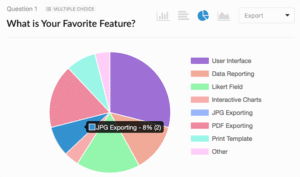
Plus, the reporting section in this plugin automatically generates beautiful reports to help you analyze your results.
Finally
This article will teach you the necessary steps before switching WordPress themes. If you found this article helpful, please share your thoughts on changing the theme of your WordPress website with us.